

Looking for a simple homemade dessert that’s creamy, sweet, and full of delicious vanilla flavor? This easy vanilla pudding recipe is just what you need!
Made with everyday ingredients like milk, sugar, egg yolks, and vanilla extract, this homemade pudding has a smooth texture and comforting flavor. It’s a wonderful alternative to boxed pudding mixes and can be prepared ahead of time for an easy dessert after dinner.
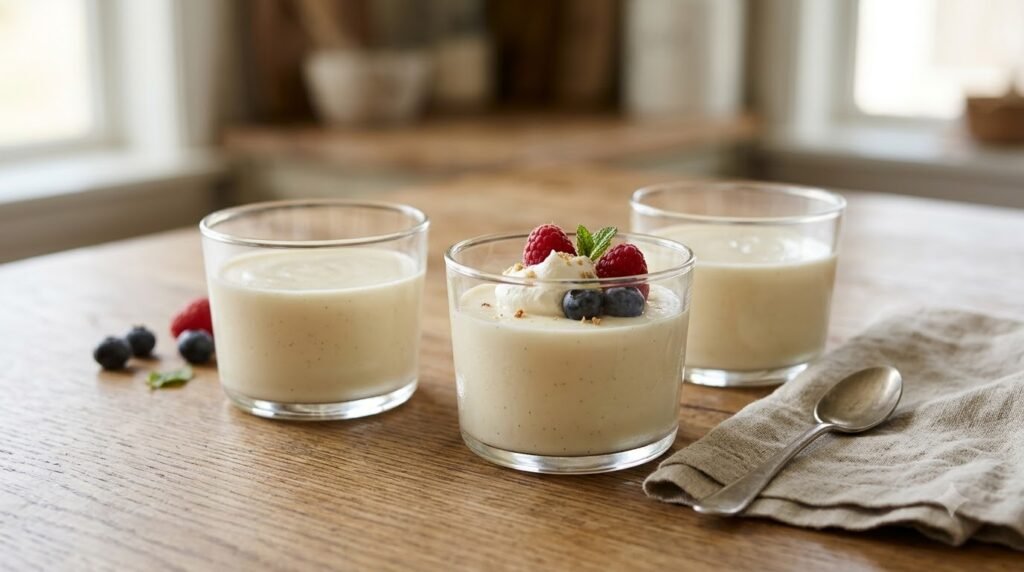
Serve it in individual dessert cups, add a little whipped cream, or top it with fresh berries for a simple but elegant treat.
The best part? You don’t need any special equipment to make this classic dessert. A saucepan, a whisk, and a little patience are all you need.
Let’s make a batch of creamy vanilla pudding!
Why You’ll Love This Homemade Vanilla Pudding
- Simple ingredients: Made with everyday kitchen staples.
- Rich vanilla flavor: Vanilla extract gives this pudding its classic taste.
- Easy to prepare: You only need a saucepan and a whisk.
- Make-ahead friendly: Chill it before serving for a refreshing dessert.
- Easy to customize: Add fresh fruit, whipped cream, or crushed cookies.
Ingredients You’ll Need
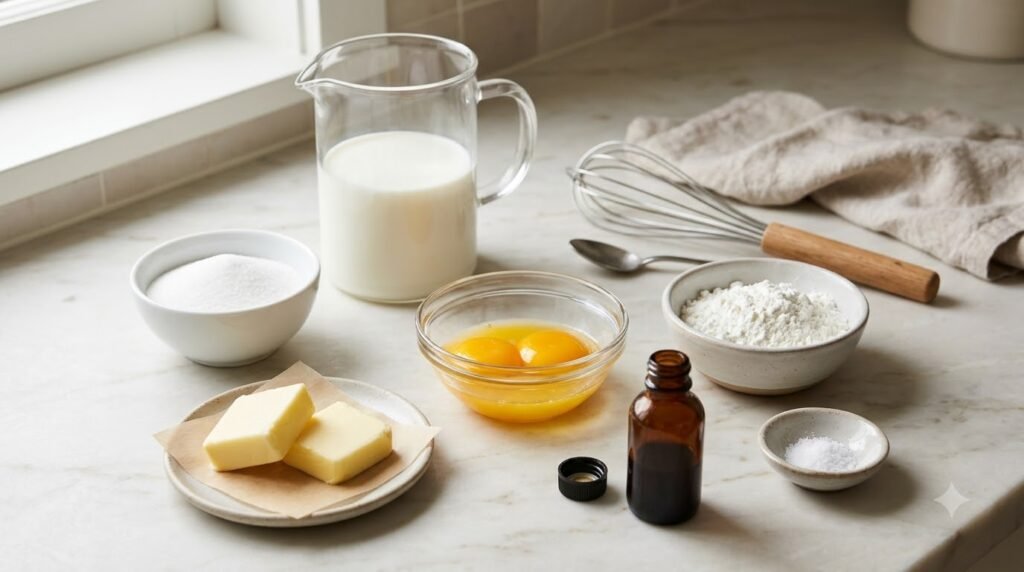
Here are the ingredients for this homemade vanilla pudding.
- 2 cups whole milk
- 1/3 cup granulated sugar
- 2 tablespoons cornstarch
- 2 large egg yolks
- 2 tablespoons unsalted butter
- 2 teaspoons pure vanilla extract
- 1 small pinch of salt
Ingredient Notes
Whole milk: Whole milk gives the pudding a creamy texture. You can use 2% milk, although the finished pudding may be slightly less rich.
Granulated sugar: Regular white sugar sweetens the pudding without overpowering the vanilla flavor.
Cornstarch: This helps thicken the pudding and creates a smooth, spoonable consistency.
Egg yolks: Egg yolks add richness and help create a custard-like texture.
Unsalted butter: Butter adds a silky finish and a little extra richness.
Vanilla extract: Pure vanilla extract provides the signature flavor. Add it after cooking to preserve its aroma.
How to Make Creamy Vanilla Pudding
Step 1: Mix the Dry Ingredients
In a medium saucepan, whisk together the granulated sugar, cornstarch, and salt until evenly combined.
This helps distribute the cornstarch and reduces the chance of lumps forming in your pudding.
Step 2: Add the Milk
Gradually whisk in the milk until the mixture is smooth.
In a separate small bowl, whisk the egg yolks until combined.
Step 3: Temper the Egg Yolks
Warm the milk mixture over medium heat, whisking frequently.
Once it is hot but not boiling, slowly pour a small amount of the warm mixture into the egg yolks while whisking constantly.
Gradually whisk the tempered egg yolks back into the saucepan.
This step helps prevent the eggs from scrambling when they meet the hot milk.
Step 4: Cook Until Thickened
Continue cooking over medium-low to medium heat, whisking constantly.
As the mixture heats, it will gradually thicken. Bring it to a gentle bubble and cook for about 1 minute while whisking, ensuring the pudding reaches a temperature sufficient to cook the egg yolks and activate the cornstarch.
Avoid leaving the saucepan unattended because the pudding can scorch on the bottom.
Step 5: Add Butter and Vanilla
Remove the saucepan from the heat.
Stir in the butter and vanilla extract until the butter melts and everything is fully incorporated.
The pudding should look smooth, glossy, and creamy.
For an extra-smooth finish, you can strain it through a fine-mesh sieve.
Step 6: Chill the Pudding
Pour the warm pudding into individual serving cups or a heat-safe container.
Press plastic wrap directly against the surface of the pudding to help prevent a skin from forming.
Let it cool briefly, then refrigerate until thoroughly chilled and set, about 2–3 hours.
Keep the pudding refrigerated while it cools; don’t leave it at room temperature for an extended period.
Step 7: Serve and Enjoy
Once chilled, remove the plastic wrap and give the pudding a gentle stir if desired.
Serve it plain or add whipped cream, fresh berries, sliced bananas, or chocolate shavings.
Your creamy homemade vanilla pudding is ready to enjoy!
Recipe Card
| Recipe Name: Creamy Vanilla Pudding Category: Dessert Cuisine: American-inspired Prep Time: 10 minutes Cook Time: 10 minutes Chilling Time: 2–3 hours Total Time: Approximately 2 hours 20 minutes to 3 hours 20 minutes Servings: 4 small servings Ingredients 2 cups whole milk 1/3 cup granulated sugar 2 tablespoons cornstarch 2 large egg yolks 2 tablespoons unsalted butter 2 teaspoons pure vanilla extract Pinch of salt Instructions Whisk the sugar, cornstarch, and salt together in a medium saucepan. Gradually whisk in the milk until smooth. Whisk the egg yolks in a separate bowl. Warm the milk mixture, then slowly whisk some of it into the egg yolks. Pour the tempered egg mixture back into the saucepan. Cook over medium-low to medium heat, whisking constantly, until thickened and gently bubbling. Continue for about 1 minute. Remove from the heat and stir in the butter and vanilla extract. Pour into serving cups and press plastic wrap against the pudding’s surface. Refrigerate until completely chilled and set, about 2–3 hours. Add your favorite toppings and serve cold. |
Tips for the Best Vanilla Pudding
Whisk Constantly
Frequent whisking helps prevent lumps and keeps the pudding from sticking to the bottom of the saucepan.
Add the Egg Yolks Slowly
Tempering the yolks before adding them to the saucepan helps prevent scrambled egg pieces in the finished pudding.
Don’t Rush the Chilling Process
The pudding needs time in the refrigerator to cool completely and develop its final texture.
Use Good-Quality Vanilla
Vanilla is the main flavor in this dessert, so a good-quality pure vanilla extract can make a noticeable difference.
Strain If Necessary
If your pudding develops a few small lumps, pour it through a fine-mesh sieve while it’s still warm.
Delicious Ways to Serve Vanilla Pudding
Here are a few easy serving ideas:
- Top with freshly whipped cream and strawberries.
- Add sliced bananas for a simple banana pudding-inspired dessert.
- Layer with crushed graham crackers in a dessert glass.
- Sprinkle chocolate shavings over the top.
- Serve with fresh blueberries and raspberries.
- Add a small cookie on the side for extra crunch.
For a party, serve the pudding in small glass cups with different toppings so guests can choose their favorites.
How to Store Homemade Vanilla Pudding
Refrigerator: Store the pudding in an airtight container in the refrigerator and enjoy it within 3–4 days.
Preventing a skin: Press plastic wrap directly against the surface before chilling, or store the pudding in a container with a well-fitting lid.
Freezing: Freezing is not recommended because the pudding may separate and become grainy after thawing.
Serving leftovers: Keep the pudding refrigerated and return any uneaten portions to the refrigerator promptly.
Because this recipe contains milk and egg yolks, don’t leave it at room temperature for more than 2 hours, or more than 1 hour when the temperature is above 90°F.
Frequently Asked Questions
1. Why Is My Vanilla Pudding Lumpy?
Lumps can develop when cornstarch isn’t mixed thoroughly or the pudding isn’t whisked enough during cooking. Whisk the dry ingredients together before adding the milk, and strain the finished pudding if needed.
2. Why Didn’t My Pudding Thicken?
The pudding may need more cooking time to reach a gentle bubble. Cornstarch thickens properly when heated sufficiently, so continue whisking and cooking briefly after the mixture thickens and begins bubbling.
3. Can I Make Vanilla Pudding Ahead of Time?
Yes! You can prepare it a day ahead and keep it covered in the refrigerator. Add fresh fruit or whipped cream just before serving for the best presentation.
4. Can I Make This Recipe Without Egg Yolks?
Yes, but the recipe will need adjustment. Egg yolks contribute richness, so an egg-free version may require additional cornstarch and a slightly different cooking method.
5. Can I Use Vanilla Bean Paste Instead of Extract?
Yes. Vanilla bean paste is a suitable substitute. Follow the product’s recommended ratio, as concentrations can vary.
6. How Do I Know When the Pudding Is Ready?
The pudding should be thick enough to coat the back of a spoon and should leave a visible trail when you run a finger through the coating. It will become firmer as it chills.
7. Can I Serve Vanilla Pudding Warm?
Yes. You can enjoy it slightly warm after cooking, although it will be thinner than fully chilled pudding. Be careful because freshly cooked pudding can be very hot.
Conclusion
This creamy vanilla pudding recipe proves that a delicious homemade dessert doesn’t need complicated ingredients or special equipment.
With milk, sugar, egg yolks, cornstarch, butter, and vanilla, you can create a smooth and comforting dessert that’s perfect for family dinners, parties, or a simple sweet treat.
Serve it with fresh fruit, whipped cream, or your favorite crunchy topping to make it your own.
Ready to make this recipe? Prepare a batch, let it chill, and enjoy every creamy spoonful!
For more easy homemade recipes and dessert inspiration, explore QuickBitesKitchen.com.